Enjoy free shipping on purchase over $100 within Canada

Learn how to fill in your eyebrows for a natural, polished look. Simple tutorial with product tips and common mistakes to avoid.
Perfectly filled brows can lift the entire face. They frame your eyes, create balance, and give your makeup a polished finish even on days when you prefer a simple routine. However, many people struggle to fill in their brows in a natural way. It often comes out too dark, too blocky, or uneven. The truth is that natural looking brows are easy to achieve when you understand the right order, pressure, and product type for your hair texture.
This tutorial breaks everything into simple steps you can follow whether you are a complete beginner or someone who wants to improve technique. The goal is a clean, soft brow that looks like your own hair, only better.
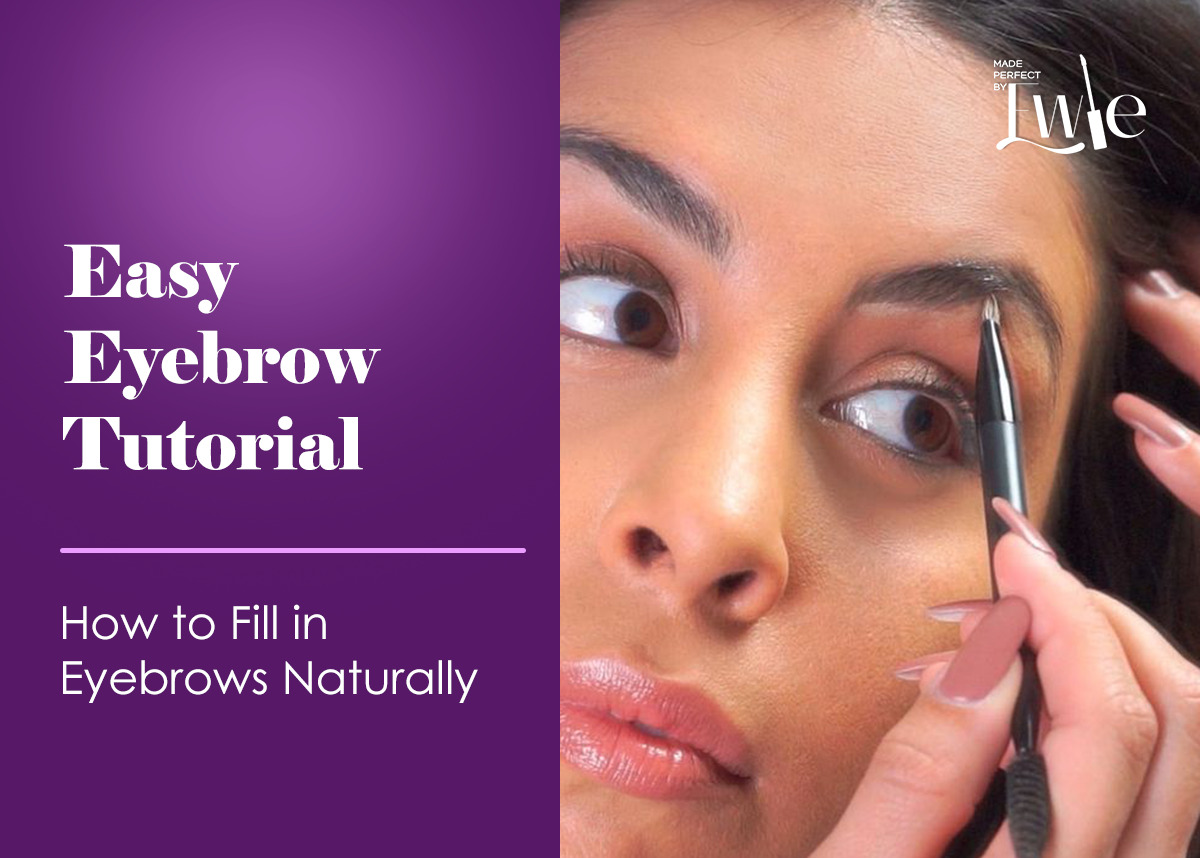
Start with clean brows. Use a spoolie brush to comb the hairs upward. This reveals the true shape of your natural brow and helps you see where the gaps are. Many people skip this simple step, but brushing makes a huge difference because it separates the hairs and shows exactly where your brow needs support.
If you use a tinted brow gel, you can apply a very light coat at this stage to lift the hairs and help them stay in place. Keep it minimal so it does not interfere with your pencil strokes.
You do not need advanced mapping to create natural brows. Just three reference points are enough:
the start of the brow
the highest point of the arch
the end of the brow
To find the start of your brow, place your brow pencil straight along the side of your nose and note where it meets your brow line. This is where the brow should naturally begin.
To find your arch, angle the pencil from the side of your nose through the center of your eye. Where it touches your brow is where the peak naturally sits.
To find the end, angle the pencil from your nose to the outer corner of your eye. This shows where your brow should taper off.
These points guide your structure without making the brow look harsh or artificial.
A natural brow is built with soft lines, not thick blocks of pigment. A fine tip pencil is the easiest tool for beginners because it lets you draw tiny strokes that look like real hair.
Choose a shade that is close to your natural brow color. If you have dark brows, go one shade lighter for a softer effect. If you have very light brows, go slightly deeper for definition.
Hold the pencil lightly with a relaxed grip. Heavy pressure creates thick lines that do not blend easily.
Instead of outlining the entire brow, place your focus only on the gaps. Draw tiny strokes in the direction of your natural hair growth. Most hairs grow upward at the front, then angle slightly toward the tail. Mimicking this pattern creates a soft, believable finish.
Avoid overfilling the inner part of your brow. This is the most common beginner mistake and it instantly makes brows look harsh. Keep the front airy and concentrate more pigment on the midsection and tail.
After placing your strokes, use your spoolie to blend them gently. Brush through the brow in upward and outward motions. This diffuses the pencil and spreads the pigment evenly through the hair, giving you that natural soft finish.
If you notice gaps after blending, add a few more strokes and blend again. Build slowly. Natural brows are created through light layers, not heavy application.
The tail is where you can add a bit more definition without ruining the natural look. Use slightly firmer strokes here to sharpen the angle and create a gentle taper. A defined tail gives the brow a lifted appearance and balances the face.
Keep the end thin and soft. Thick or blunt brow tails make the entire brow look heavy.
Once you are happy with the shape, set the hairs in place so the brow lasts all day. A clear gel gives a clean hold. A tinted gel can add slight volume and color to the hairs for a fuller look.
Brush the gel upward at the front and slightly sideways toward the tail. This keeps the shape structured but still natural.
If you want the brow to look extra polished, take a small flat brush with a very small amount of concealer and gently clean around the lower edge of the brow. This brightens the eye area and makes the brow pop without looking carved out.
Blend the concealer well so it melts naturally into your skin.
Here are the small mistakes that usually ruin natural brows:
Applying too much pressure with the pencil
Filling the entire brow instead of the sparse areas
Using a shade that is too dark
Making the inner brow square and sharp
Skipping blending with a spoolie
Drawing the tail too thick
Avoid these and your brows will look clean and realistic every time.
Filling in your brows naturally is all about gentle strokes, the right shade, and good blending. With a fine tip pencil, a soft touch, and a light hand, you can shape brows that lift your face and enhance your features without looking overdone.
Back To Articles